
Van Sleep Systems: Build a Comfortable Sleeping Setup
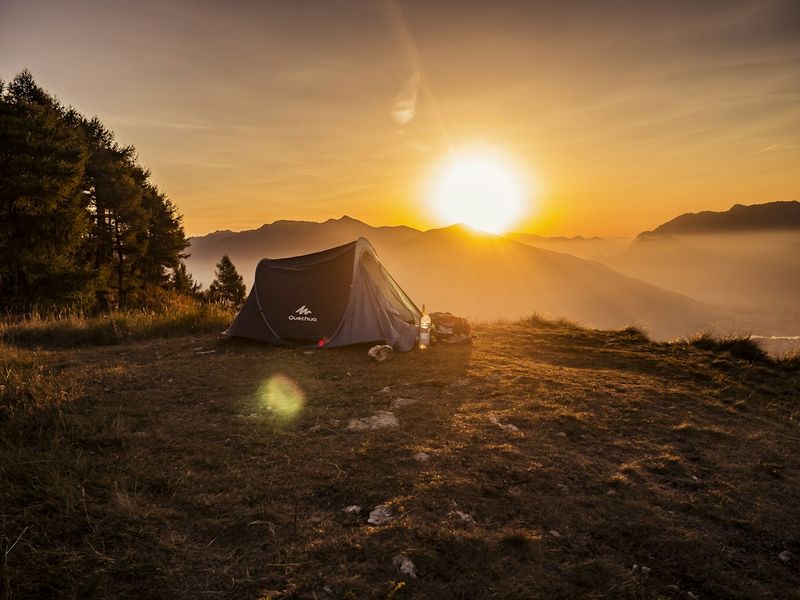
The single difference between a van that feels like a cozy home and one that feels like a sad parking lot nap is the bed. A well-designed sleep system is flat, warm, ventilated, and hides all your gear underneath. Build it badly and you will wake with a sore back, fogged windows and a van that smells like damp carpet. This guide walks through the layout choices, the mattress that actually sleeps, insulation and ventilation, storage, and a step-by-step DIY build plan you can finish in a weekend.
This is for self-converters in a Sprinter, Transit, ProMaster, or even a minivan. Before you cut wood, pair the build with our first-timer packing list and know where you are allowed to actually park it using the free overnight finder.
Pick your layout first
The layout decides everything that follows. There are three proven options, and the right one depends on your van length and whether you live alone or with a partner.
1. Fixed platform bed (rear)
A full-time bed fixed across the back of the van, usually built on top of storage drawers. Pros: always made, nothing to fold, the most comfortable sleep. Cons: blocks the middle of the van, so you cannot carry bikes or long lumber inside. Best for: high-roof long-wheelbase vans where comfort wins over cargo.
2. Platform that converts into seating (the most popular)
A bed platform along one side or across the back that lowers, slides or flips into a bench/dining area during the day. This is the classic "four-season" build: you get a usable living space and a proper bed. It needs more hinges and engineering, but it is the best balance for most self-converters.
3. Fold-down / bench-to-bed (small vans)
In a minivan or short-wheelbase van, a bed that folds flat from the rear seats or a simple platform that tucks away keeps the vehicle drivable and useful as a daily car. It is less comfortable but lets you vanlife without a second vehicle.
Size the bed to real humans
Measure the tallest sleeper, not yourself in a tuck. A mattress that is too short forces you to sleep diagonally. Common dimensions: a single sleeper does well at 30–36 in wide × 72 in long; a couple needs at least a 54 in (full) × 75 in platform. Remember the van's wheel wells eat floor space—build the platform around them, not over them.
Choose the mattress that actually sleeps
This is where cheap builds fail. A thin yoga pad on plywood gives you the worst night of your trip. Options, best to worst for vanlife:
- Memory-foam or latex topper (2–4 in): the sweet spot. Comfortable, and you can trim it to your exact platform shape. Add a cheap egg-crate under it for insulation.
- Foldable futura/foam mattress: great if your platform converts; folds away in seconds. Slightly firmer.
- Air mattress: cheap and soft, but punctures and deflate at 3 a.m. Use only as a backup.
- Sleeping pad on a plank: ultralight backpacking approach; works but forget hotel-level comfort.
Whatever you choose, put a breathable, washable cover on it—van humidity finds every fabric.
Insulation: the unsung comfort upgrade
Without insulation you fight condensation, cold floors in winter and a greenhouse in summer. The walls, floor and ceiling should get a layer. Practical, DIY-friendly materials:
- Rigid foam board (XPS/EPS) cut to wall cavities—cheap, waterproof, great R-value. Seal edges with foil tape.
- Sheep's wool or Thinsulate in the ceiling and around windows for sound and thermal control.
- Reflective bubble foil on the floor under the platform to cut radiant heat.
Never use fiberglass without a fully sealed enclosure—moisture trapped against bare metal rots the van from inside.
Ventilation: stop the windows from sweating
Two people breathing in a closed van produce about a liter of water overnight. Without airflow, that water lands on your windows and ceiling. The fixes, in order of impact:
- A roof fan (12V) that exhausts moist air—the single best upgrade you can buy.
- Crack a window or vent slightly, and use window bug screens so you can sleep with airflow and no insects.
- Cover windows with insulated reflectix panels at night to cut condensation and add privacy.
Storage under the bed
The space under a raised platform is your whole closet. Plan it before you build:
- Drawers for clothes and kitchen boxes that pull all the way out.
- Bins that slide on rails for bulky items (batteries, water jugs, tools).
- Dedicated slots for the spare tire, jerry cans and portable toilet so they do not roll at 60 mph.
Raise the platform just high enough to clear your bins—too high and you lose headroom and sleep on a top bunk.
Step-by-step DIY build plan
- Measure and draw. Sketch the platform around the wheel wells; mark bin heights so storage actually fits.
- Insulate the floor and walls first, before anything goes in. Seal gaps with foil tape.
- Frame the platform with 2×2 or plywood ribs anchored to the van's seat bolts or wall studs—never to thin sheet metal alone.
- Install drawers/slides and test that bins pull out before you add the top.
- Lay the plywood deck, round the edges, and lay down a non-slip mat.
- Add the mattress topper and a washable cover.
- Mount a 12V fan and window screens, then do a sleep test in the driveway before your first trip.
Key takeaways
- Choose a layout that matches your van length: fixed bed, convertible bench, or fold-down for small vans.
- A 2–4 inch memory-foam topper on a plywood deck beats any thin pad; put a washable cover on it.
- Insulate before you build, and buy one 12V roof fan—it solves condensation and comfort at once.
- Design under-bed storage around real bins, and anchor the frame to seat bolts, never to bare sheet metal.
Frequently asked questions
Do I need to insulate my van if I only camp in summer?
How high should I build the bed platform?
Is a convertible bed worth the extra complexity?
Sources: vanlife DIY community build logs; insulation and ventilation best-practice references; camper-van outfitter guidance. Build tips verified October 2026; always anchor structurally and check local rules on where you may legally overnight with the state overnight rules guide.
一辆房车是感觉像温馨小家,还是像在停车场凑合补觉,差别全在那张床上。一套设计良好的睡眠系统要平整、暖和、通风,还能把所有装备藏在下面。做砸了,你就会腰酸背疼地醒来,车窗起雾、车里一股潮地毯味。本文讲清布局选择、真正好睡的床垫、保温与通风、储物,以及一个周末就能完成的 DIY 搭建步骤。
本文面向在 Sprinter、Transit、ProMaster 甚至小型面包车里自改的人。动刀锯木之前,先对照新手打包清单,并用免费过夜点查询搞清楚你到底能合法停在哪。
先选布局
布局决定后面的一切。三种经过验证的方案,选哪个取决于你的车长,以及你是独自住还是和伴侣一起。
1. 固定后横床
一张固定在车尾的整床,通常建在储物抽屉之上。优点:永远铺好、不用折叠、睡得最舒服。缺点:挡住车厢中部,里面放不下自行车或长条木料。适合:高顶长轴车,舒适优先于载货。
2. 可转换成座位的平台(最流行)
沿一侧或车尾搭建的床,白天可降下、滑动或翻折成长凳/就餐区。这是经典的"四季"布局:既有可用的起居空间,又有正经的床。铰链和工程量更大,但对大多数自改者来说是最佳平衡。
3. 翻折/座椅变床(小型车)
在小型面包车或短轴车里,床从后排座椅翻平,或简单平台收折起来,让车辆仍可日常通勤。没那么舒服,但让你不用再单独养一辆车也能玩 vanlife。
按真人尺寸定床
量最高那个睡觉的人,别量自己蜷缩的样子。床垫太短,你就只能斜着睡。常见尺寸:单人睡 30–36 英寸宽 × 72 英寸长就够;一对情侣至少要 54 英寸(full)× 75 英寸的平台。记住轮拱会吃掉地面空间——平台要绕着轮拱做,而不是盖在上面。
选真正好睡的床垫
廉价改装就败在这一步。胶合板上垫块薄瑜伽垫,会让你整夜难安。选项从好到差:
- 记忆棉或乳胶床褥(2–4 英寸):甜点选择。舒服,还能裁成平台的异形。下面再垫块便宜的蛋托棉增强隔热。
- 可折叠泡沫床垫:平台可变形时很棒,几秒折起。略硬一点。
- 充气床垫:便宜柔软,但会被戳破、凌晨三点漏气。只当备用。
- 木板上的睡垫:轻量化背包客做法;能用,但别指望酒店级舒适。
无论选哪种,套一个透气、可拆洗的床罩——车里的潮气会钻进每一块布。
保温:被低估的舒适升级
不保温,你就要和结露、冬天冰冷的地板、夏天的温室效应搏斗。墙、地板、天花板都应铺一层。DIY 友好的实用材料:
- 挤塑/聚苯乙烯泡沫板(XPS/EPS)塞进墙腔——便宜、防水、隔热值高。边缘用铝箔胶带封死。
- 羊毛保温棉或 Thinsulate铺在天花板和窗框周围,兼顾隔音与温控。
- 反光气泡箔铺在平台下的地板上,阻隔辐射热。
千万别用没做全密封的玻璃棉——湿气贴在裸金属上,会从里面把车烂掉。
通风:别让车窗起雾
两个人在密闭车里过夜,一晚会呼出约一升水汽。空气不流通,这些水就落在车窗和天花板上。按效果排序的解决办法:
- 一台 12V 车顶排气扇把湿空气抽走——你能买的单项最佳升级。
- 窗户或通风口留条小缝,配上车窗防虫网,这样能开缝睡又没有蚊虫。
- 夜间给窗户贴上隔热反光板,既减结露又增隐私。
床下储物
抬高平台下的空间就是你全部的衣柜。搭之前先规划好:
- 抽屉放衣服和厨具箱,能完全拉出来。
- 大件(电池、水桶、工具)用滑轨上的收纳箱。
- 给备胎、备用油桶和便携马桶留专用卡位,免得开到 60 英里时滚来滚去。
平台只抬到能塞进收纳箱的高度——太高会压低头顶空间,像睡上铺;太低则装备塞不进。
分步 DIY 搭建计划
- 测量画图。绕开轮拱画出平台;标出箱子高度,确保储物真的放得下。
- 先做地板和墙面保温,再进任何东西。缝隙用铝箔胶带封。
- 用 2×2 方料或胶合板肋条搭框架,固定在原车座椅螺栓或墙骨上——绝不能只钉在薄铁皮上。
- 装抽屉/滑轨,在上盖板之前先试拉一遍箱子。
- 铺胶合板台面,磨圆边缘,铺一张防滑垫。
- 加记忆棉床褥和可拆洗床罩。
- 装 12V 风扇和纱窗,第一趟出发前先在自家车道睡一晚测试。
要点速记
- 按车长选布局:固定床、可变形长凳,或小车用翻折床。
- 胶合板上一块 2–4 英寸记忆棉床褥胜过任何薄垫;记得套可拆洗罩。
- 搭之前先保温,再买一台 12V 车顶扇——它一次解决结露与舒适两件事。
- 床下储物要按真实箱子设计;框架固定在座椅螺栓上,绝不能钉在裸铁皮上。
常见问题
如果只在夏天露营,还需要给车保温吗?
床平台该建多高?
变形床值得多搞那些复杂结构吗?
资料来源:vanlife 自改社区搭建日志;保温与通风最佳实践资料;房车改装厂指南。搭建建议核实于 2026 年 10 月;务必做结构性固定,并通过各州过夜规则确认你能合法停靠的地点。
First-Time Packing List首次打包清单
Read →阅读 →
The 14-Day Rule14 天停留规则
Read →阅读 →
Leave No Trace无痕山林法则
Read →阅读 →Find where to park your van for free找到免费停车过夜的地方
Legal overnight spots by state, land type and amenities.按州、土地类型与设施查合法过夜点。
Open the overnight finder打开过夜点查询